
Ah, beet kvass. It’s so good! If you haven’t read much on beets, conventional or fermented, I would suggest perusing through the posts already on the subject (here, here, and recipe here). This article is meant to help work through some of the issues that can pop up while getting the hang of fermented beet juice. Join me for some tips on how to improve your beet kvass!
Beet Kvass Overview
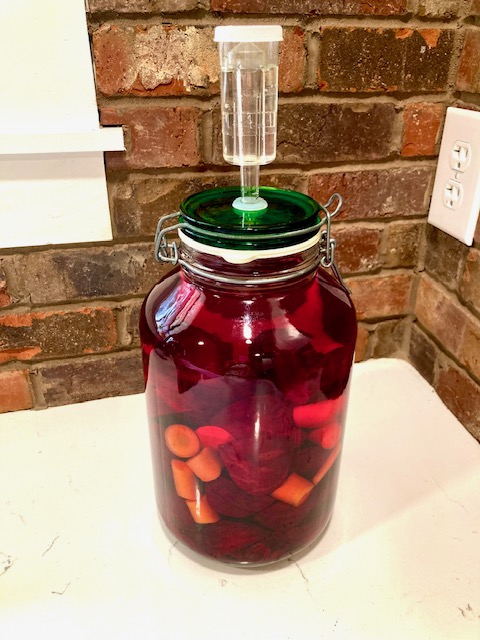
First off, let’s talk about what beet kvass is. This will be review for those of you who haven’t read the above mentioned articles. You can actually juice beets and take that juice, inoculate it with a beneficial bacteria, and call it fermented beet juice. However, beet kvass is different. Peeled and quartered beets, along with a 1% brine, are added to a fermenting vessel and allowed to ferment for 10-30 days. Then the brine is strained from the beets and bottled for drinking or adding to soups.
The reason why I believe the second method is far superior to juiced beets is due to the oxidization that occurs when pressing, squeezing or shredding out juice from the beets. Oxidization starts the decomposition process of the food. In addition, it can increase inflammation in the body as well as potentially cause carcinogenic effects. It just seems counterproductive when trying to ingest health promoting vegetables.
Now that we have a quick overview, let’s cover the couple of issues that can plague kvass and how to improve your beet kvass.
Kahm Yeast
Kahm. It happens to everyone at some point. Kahm is a soil borne yeast that, in my experience, affects beet kvass the most. However, it can affect any vegetable ferment because it’s found in the soil. The good news is that kahm is considered GRAS (generally regarded as safe)! The bad news is that it will mess with your ferment’s pH and with the taste. In addition, it will steal nutrients and sugars from your ferment, adding to the bitter/off taste (but not off in a mold type way).
Mold and Kahm Appearance
It would help if you had a visual of what kahm can look like. Let’s compare it with mold, because that is the microbe group that we definitely want to be on the lookout for, and they can be confused with one another.
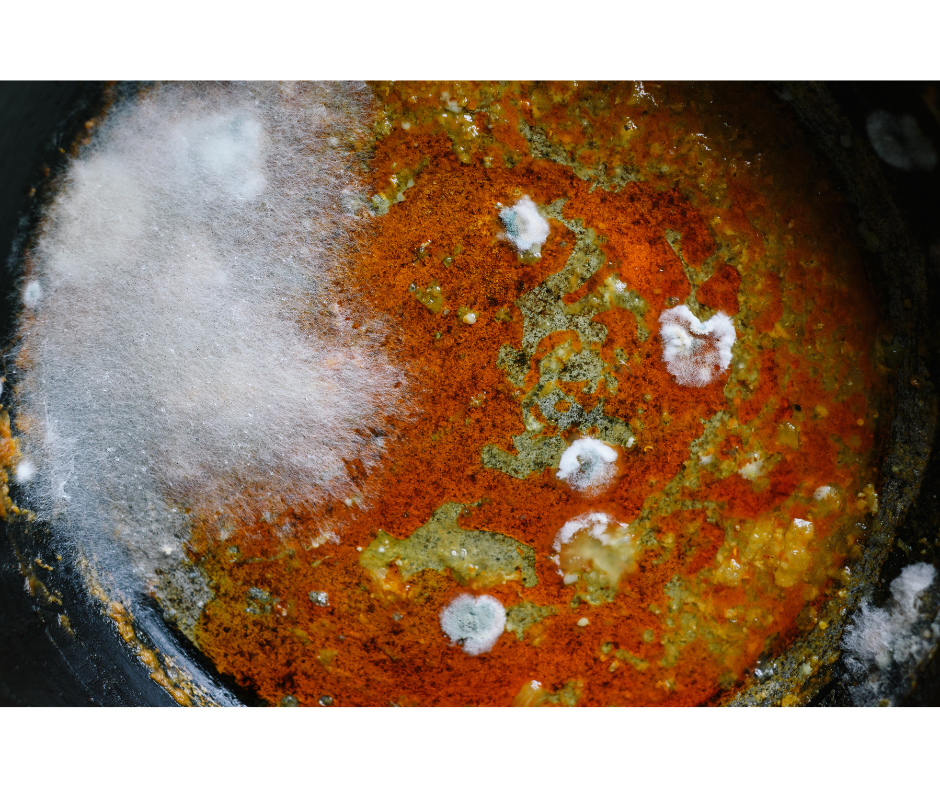
Mold
If you notice the above picture, the mold is white, fuzzy, and tends to be in circular patterns over the top. While this example shows white mold, it can vary in colors drastically, essentially covering the rainbow color spectrum. This article does a good job of going over the various mold colors and what they might mean. Several of the molds are toxic and can cause allergies or respiratory issues. Also, many molds that are considered safe look very similar to the dangerous ones. It is suggested to be one the safe side and toss food when in doubt.
When discussing molds, my article on the the science behind fermentation and it’s benefits has more information. The short version is that mold grows roots through food (similar to trees). So, if you are dealing with a brine ferment, it’s best to throw it all out as opposed to skimming off the top, as is frequently suggested. The reason being is that the mold is likely all throughout the ferment because of the roots and spores being produced. If you’re talking about something like a hard cheese or bread, cutting an inch around/down is usually sufficient. The hard texture of those items slow the growth process and prevent the roots from spreading all throughout the food. Now onto kahm.
Kahm
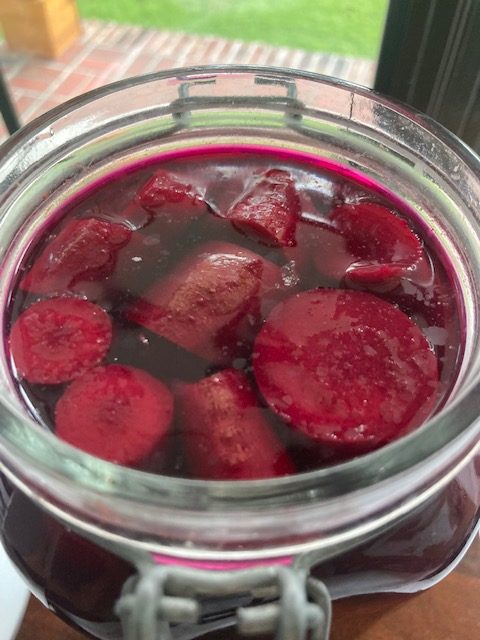
Kahm is different from mold in appearance because it is a flat, clear-ish to white film/layer that can cover the whole top of the ferment. In my picture above, the kahm is just in the beginning stages, so you can see clear-ish spots all over the surface. If I had continued to let it grow, it would eventually have covered the whole surface.
However, if kahm develops early on in a ferment when lots of other gasses are being produced, the color from the ferment/brine can get “mixed” (for lack of a better word) with the kahm and it can almost have a different color appearance. But more often than not, you will be able to tell it has a flat, filmy appearance. If lots of bubbles are being produced, sometimes the film will be on top of those. But again, it won’t be fuzzy or wild colors like mold. In addition, you won’t be able to smell much of a difference in your ferment. As I said earlier, it will taste not good, but it won’t have that dirt taste similar to mold. It will be more sour and bitter.
Preventative Steps
Because kahm is a soil born yeast, it’s best practice to peel your beets. This helps mitigate the kahm issue, but doesn’t insure a kahm free ferment. However, old produce usually has more of a problem with kahm. In addition, the yeast tends to be activated by warmer temperatures. I personally like putting my beet kvass right in the fridge. I have never had a kahm issue when doing this method. It will, however, extend your fermentation time by double at least. The way I deal with the extra long fermentation time is by having a system of 2-3 jars fermenting so I can always have some ready to go.
In any case, it’s best to scoop any kahm off the top right away. You can strain the liquid through a cheese cloth to try and filter out the kahm. Then try continuing the ferment on the counter. But most likely, it will come back. I usually skim kahm off and directly put it in the refrigerator to finish out the fermentation time. If it’s towards the end of the fermentation time, I’d just go ahead and start consuming it. If the flavor is somewhat unpleasant, you can always mix it with other fermented juices, or toss some into a pot of soup at the very end to use it up but not experience as much of the off flavorings.
How to Improve Your Beet Kvass Flavor
Sometimes there is a complaint that the beet kvass tastes sweet, salty, or earthy. Generally, any one of these issues could be an indicator that the ferment needs more time to finish. LABS will eat up the sugars in the beets and they will use the salt for energy, so sometimes giving it more time to accomplish that will fix the flavor problem. I would let it go for another 5-10 days and then recheck.
Another reason for one of those unwanted flavors could be that you’re dealing with old produce. When your beets are old, they lack the proper amount of sugar to sustain the LABS until it’s finished fermenting. I like adding in one carrot cut into chunks for each 1-2 liters of beet kvass. This definitely helps mitigate the low sugar issue.
In addition, I have found that well fermented beet kvass doesn’t have an earthy taste like a fresh beet might have. This could be partly due to fresh versus old produce, the correct amount of fermentation time, the presence of kahm, or a combination of any. Addressing any or all of these usually fixes the earthy taste (unless you’re dealing with kahm that’s gotten out of hand).
The Beauty of Good Beet Kvass
A well done ferment has an extremely complex flavor with a bit of tang and bite. It is truly one of the most amazing flavors you will ever taste! Don’t get discouraged if your first few don’t turn out too well. It just takes time to get the hang of it. The more batches you have under your belt, the better you will be able to distinguish a good batch from a not so good batch. And another added benefit is that you will be able to gauge the flavor you like best, be it a 10, 15, or 30 day ferment.
Hopefully this how to improve your beet kvass has helped! Happy fermenting!
Leave a Reply